Scalable Spark Deployment using Kubernetes - Part 6 : Building Spark 2.0 Two Node Cluster
In last post, we have built spark 2.0 docker image. As a next step we will be building two node spark standalone cluster using that image. In the context of of kubernetes, node analogues to a container. So in the sixth blog of the series, we will be building two node cluster containing single master and single worker.You can access all the posts in the series here.
TL;DR you can access all the source code on github.
Spark Master Deployment
To start with we define our master using kubernetes deployment abstraction. As you can recall from earlier post, deployment abstraction is used for defining one or morepods. Even though we need single master in our cluster, we will use deployment abstraction over pod as it gives us more flexiblity.
apiVersion: extensions/v1beta1
kind: Deployment
metadata:
  labels:
    name: spark-master
  name: spark-master
spec:
  replicas: 1
  template:
    metadata:
      labels:
        name: spark-master
    spec:
      containers:
      - name : spark-master
        image: spark-2.1.0-bin-hadoop2.6
        imagePullPolicy: "IfNotPresent"
        name: spark-master
        ports:
        - containerPort: 7077
          protocol: TCP
        command:
         - "/bin/bash"
         - "-c"
         - "--"
        args :
         - './start-master.sh ; sleep infinity'
The above yaml configuration shows the configuration for the master. The noteworthy pieces are
-
image - We are using the image we built in our last post. This is availble in local docker images.
-
imagePullPolicy - By default kubernetes tries to pull the image from remote servers like dockerhub. But as our image is only available locally, we need to tell to kubernetes not to pull from remote. imagePullPolicy property of configuration allows to us to control that. In our example, we say IfNotPresent , which means pull only if there is no local copy. As we already have built the image, it will be avaialble and kubernetes will not try to pull from remote.
-
ports - We are exposing port 7077 on which spark master will listen.
-
command - Command is the configuration which tells what command to run when container bootstraps. Here we are specifying it to run start-master script
You can access complete configuration on github.
Starting Spark Master
Once we have our configuration ready, we can start the spark master pod using below command
kubectl create -f spark-master.yamlSpark Master Service
Once we have defined and ran the spark master, next step is to define the service for spark master. This service exposes the spark master on network and other workers can connect to it.
apiVersion: v1
kind: Service
metadata:
  name: spark-master
  labels:
    name: spark-master
spec:
  ports:
    # the port that this service should serve on
  - name: webui
    port: 8080
    targetPort: 8080
  - name: spark
    port: 7077
    targetPort: 7077
  selector:
    name: spark-master
The above yaml configuration for spark master service. We are naming the our service also spark-master which helps in resolving proper hosts on cluster.
We are also exposing the additional port 8080 for accessing spark web ui.
You can access complete configuration on github.
Starting Spark Master Service
Once we have defined the master service, we can now start the service using below command.
kubectl create -f spark-master-service.yamlSpark Worker Configuration
Once we have our spark master and it’s service started, we can define the worker configuration.
apiVersion: extensions/v1beta1
kind: Deployment
metadata:
  labels:
    name: spark-worker
  name: spark-worker
spec:
  replicas: 1
  template:
    metadata:
      labels:
        name: spark-worker
    spec:
      containers:
      - image: spark-2.1.0-bin-hadoop2.6
        imagePullPolicy : "IfNotPresent"
        name: spark-worker
        ports:
        - containerPort: 7078
          protocol: TCP
        command:
         - "/bin/bash"
         - "-c"
         - "--"
        args :
         - './start-worker.sh ; sleep infinity'
As we are building two node cluster, we will be running only single worker as of now. Most of the configuration are same as master other than command which starts the worker.
You can access complete configuration on github.
Starting Worker
You can start worker deployment using below command
kubectl create -f spark-worker.yamlNow we have all services are ready
Verifying the Setup
Run below command to verify that both spark master and spark worker deployments are started.
kubectl get poThe above command should two pods running as below
NAME                            READY     STATUS    RESTARTS   AGE
spark-master-498980536-6ljcw    1/1       Running   0          15h
spark-worker-1887160080-nmpq5   1/1       Running   0          14h
Please note that exact name of the pod will differ from machine to machine.
Once we verified the pods, verify the service using below command
kubectl describe svc spark-masterThe above command should show result as below
Name:                   spark-master
Namespace:              default
Labels:                 name=spark-master
Selector:               name=spark-master
Type:                   ClusterIP
IP:                     10.0.0.147
Port:                   webui   8080/TCP
Endpoints:              172.17.0.3:8080
Port:                   spark   7077/TCP
Endpoints:              172.17.0.3:7077
Session Affinity:       None
If both of the commands ran successfully, then we have spark cluster running successfully.
Testing our spark cluster
We can test our spark deployment using observing web ui and running some commands from spark shell.
Accessing Web UI
In our configuration of spark master, we have exposed the UI port 8080. Normally it will be only available within spark cluster. But using the port forwarding, we can access the port on our local machine.
First let’s see the pods running on cluster using below command
kubectl get poIt should show the below result
NAME                           READY     STATUS    RESTARTS   AGE
spark-master-498980536-kfgg8   1/1       Running   0          14m
spark-worker-91608803-l22pw    1/1       Running   0          56s
We should port forward from master pod. Run below command. The exact name of the pod will differ from machine to machine.
kubectl port-forward spark-master-498980536-kfgg8 8080:8080Port-forward takes two parameters. One is the pod name and then port pair. In port pair the first port is container port and next one is local.
Once port is forwarded, go to this link http://localhost:8080.
You should see the below image
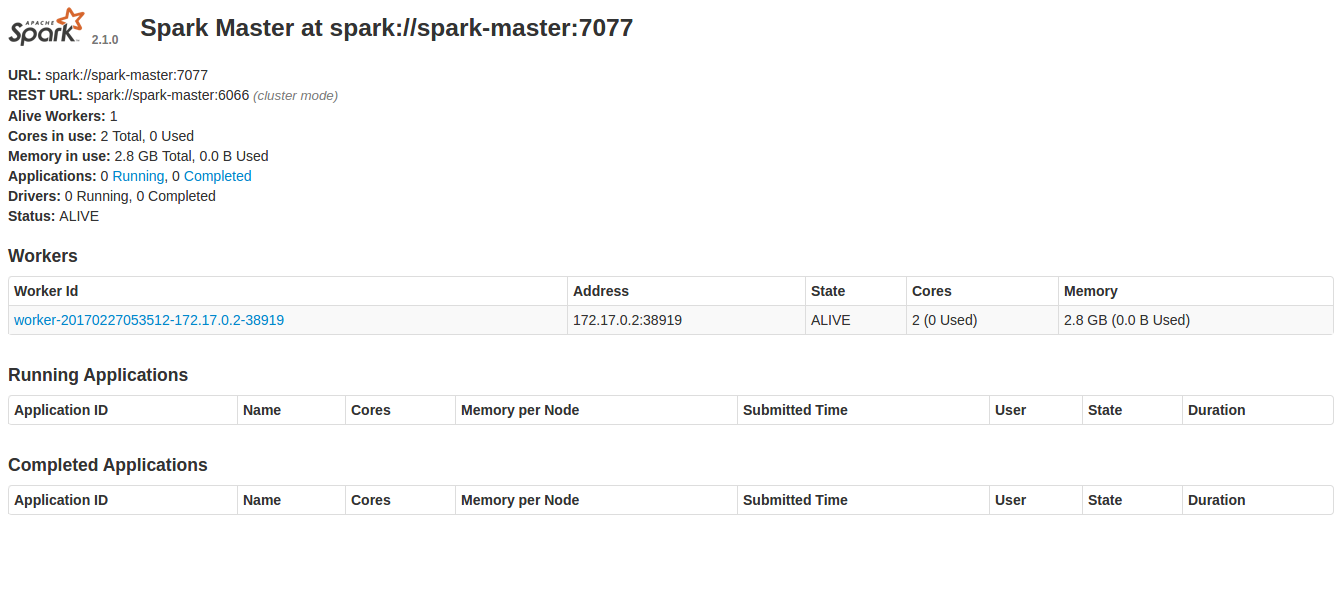
Spark Shell
Once we have spark ui, we can test the spark from shell. Let’s run the spark shell from master container.
First we need to login to our master pod. Run below command
kubectl exec -it spark-master-498980536-kfgg8 bashStart the spark shell using below command
/opt/spark/bin/spark-shell --master spark://spark-master:7077Run below command to run some spark code
sc.makeRDD(List(1,2,4,4)).countIf the code runs successfully, then our cluster setup is working.
Conclusion
In this blog, we have succesfully built two node spark cluster using kubernetes absttractions.
What’s Next?
Now we have defined our barebone cluster. In next blog, we will how to scale the cluster using kubernetes tools. Also we will discuss how to do resource management in the cluster.